Join Us in Gathering a Budget-Friendly Disaster Supply Kit!
We’re slowly gathering items for a 3-day disaster supply kit. Join us as we get items in small increments for a complete bin of emergency supplies. Each phase will be posted with a photo, a list of items, the cost of the items and an emergency tip or action item. Join us in this process so you can be ready when disaster strikes! Here are the first two phases:
PHASE ONE:
-Large container for storing your kit – we chose a clear, 66 quart bin with latching lid (clear – so you don’t have to guess what’s inside!) $9
– 1 gallon of water 89 cents 
– Flashlight $10
– Whistle $1
– Permanent marker $2
– Dietary supplements/electrolyte replacements $8
– 2 Ready-to-eat tuna packets $3 ($1.49 each)
– Can of beans $1
– Manual can opener $5
Total spent this phase: Approximately $40. Don’t be alarmed- this is the most expensive phase!
Phase One tip: Put food you would normally eat in your disaster kit. Your body will be stressed after an emergency so it’s best to eat things that your system is accustomed to.
PHASE TWO
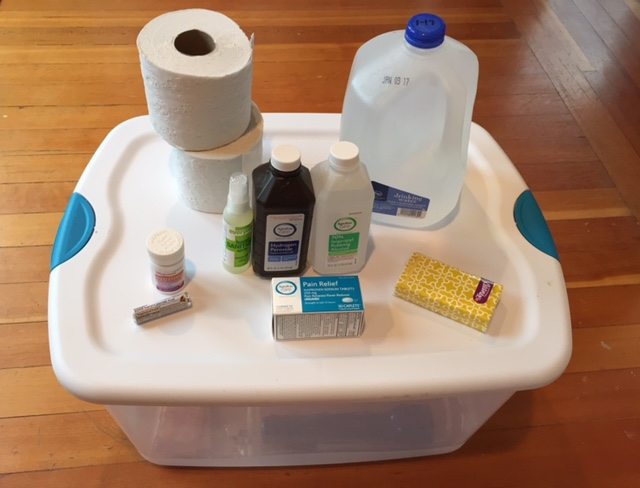
Disaster supply kit, phase two
– Toilet paper, 2 rolls $1.50
– Another gallon of water 89 cents
– Upset stomach meds $5
– Roll of antacids $1
– Hand sanitizer $2.49
– Hydrogen peroxide $1
– Isopropyl alcohol $1.25
– Tissues 89 cents
– Pain reliever $6 (Or free! See tip below.)
Total spent this phase: Approximately $20.
Phase Two tip: When you run across useful disaster kit items that are Buy One Get One Free at the store, buy one for your home, then get one FREE for your emergency supply kit!
Follow along on Home Gnome’s Facebook page for the next phases!